
Before you log a call to have a new website created, follow these six steps.
- Know your audience
Do an analysis of the people who will be visiting your site so that you can tailor your design to meet their needs.
- Create a style guide
Make sure all the elements on your site will be consistent and measure up to your standards by formalising your style.
- Plan your content
Create a spreadsheet of all the content that will be uploaded to your site.
- Navigation and information architecture
Consider your navigation and information architecture. Decide how your content will be accessed by readers to your website, how will they navigate around the site and where the information will be placed.
- Wireframe your site
Draw a mock-up of your site, laying out the various elements for each page.
- Create copy decks
Write the copy for your site in a format that is ready to be uploaded.
Know your audience
You first need to think about who will be visiting your website so that you can tailor your design structure and content to best suit their requirements.
- Describe your audience and their needs and requirements
The content you create and use on your website must be relevant, useful and meaningful to your visitors. In order to determine which content to use, make a list of the types of people you think will be visiting your website. Identify common characteristics and keep them in mind when composing your content.
- Create personas.
Take your audience analysis one step further and create ‘personas’ for selected audience groupings. A persona is a ‘real’ character with behaviours, qualities, requirements and motivations. Pick three or four ‘people’ as your personas and give each a name and personality characteristics, details.
For example, if you were building a website about the Jammie Shuttle, you would need to know about the type of people using the service:
- Use your audience analysis and personas to determine:
- If you already have a website, do an analysis of your existing content by looking at your web statistics. From these you can tell which of your existing content has been the most popular with your audience. You can then tailor your future content to match these trends.
- This does not simply mean reusing the same content. It means examining the current trends, analysing requirements of your audience and basing your content creation on these factors.
- Match your audience needs when planning and creating your content.
- What will draw and keep their interest?
- What information and features does each persona need?
- What information and features will keep them coming back to the site?
Create a style guide
- What is a style guide?
A style guide is a working document that outlines the conventions that will be followed on your site when writing and posting content. The document is effectively a blueprint which ensures that you will maintain consistency across your site in, for example:- voice, tone and web writing style
- grammar and punctuation
- preferred word choice (e.g. monitor vs display vs screen)
- How to create a style guide
This is an outline of your style, which should be tailored to speak to your target audience and appropriately reflect your organisation. You can either use a pre-existing style which you are comfortable with, or you could use a more formal guide. In the former case, you will need to formalise your web writing and layout style and preferences in a document.
If you choose to use a pre-existing guide, there are many examples online to choose from which can either be purchased or downloaded. They contain various guidelines on things such as word choices, spelling and layout. You can always incorporate elements of these into your own manual.
Examples of well-known style guides:
Once your style guide is complete, it should be shared with everyone who will be working with the website and creating content:
- Domain administrators
- Content managers
- Page managers
- External content contributors
Useful tip: If there are several people working on the content and construction of your website, it helps to store all of your information in a shared location that you can all access. OneDrive for Business could be used for this purpose.
Plan your content
If you already have a website
You will need to do a thorough audit of all the content you have and decide what to keep, what to modify and what to discard. You will then have to list any new content you wish to add to the site.
- Draw up a content analysis spreadsheet
Start by putting together a spreadsheet to analyse your content with the following fields, which you can adjust as you see fit:
#
Page title
Description
Existing?
Status
Owner
Filename
Main menu*
Sub-menu*
1
About
About the organisation
Y
Modification in progress
Bob
About.docx
About
n/a
2
Our staff
Organogram and list of staff
Y
Modification in progress
Susan
Staff.docx
About
Personnel
3
Contact us
Contact details and map
N
To be written
Bob
N/A
Contact
n/a
- Analyse your content
You will need to review every page of your website and decide whether the content of that page is- relevant
- current
- useful
Based on this analysis, you can decide what to keep, what needs changing (and how) and what to discard. You also need to identify what content is missing or if there are any gaps in your information.
You can then move on to develop a working content matrix, which will guide you in creating and updating your content.
- Create a working content matrix
This document will form a plan and a record of all the content that will be uploaded to your site. It is a great tool to aid your workflow and organisation. Transfer all the articles you have decided to keep to the matrix and add all the new pages you have decided you will need on your site. This is a working document and you can come back to it and adjust it as ideas for your site grow and develop.
The following is an example of a working content matrix:Page title
Description
Relevance (1-5)
Current? (1-5)
Useful? (1-5)
Keep as is
Discard
Modify
URL
1
About
About the organisation
1
3
1
N
n
Y (update)
www.example.com/about
2
Our staff
Organogram and list of staff
1
5
3
N
n
Y (update)
www.example.com/staff
*The main and sub menus can be filled in at a later stage and refers to the menu items under which the article will appear.
If you do not have a website yet:
You will need to make a list of the content you will need on your site and place this into a working content matrix (an example of which can be seen in the paragraph above).
You don't need to put all the content in at once, but rather add it as you discover what content you will need on the site.
Navigation and information architecture
Information architecture means organising where everything on your website will go and how your information will be grouped. Navigation means how you show your visitors around your website and content, and how you indicate what actions they can perform. You can do this step in conjunction with the following step, wireframing.
The following image is a diagram of all the various elements of a web page that you will be planning and creating content for.

- Categorise your data.
Once you have set up the content matrix to your satisfaction, you can begin to organise your pages according to categories. Group your pages by content type and subject, into sections with similar or related content. An example of this would be the ‘About’ section, including things like:- an introductory or welcome page
- a page about the history of your organisation
- a page about your organisation
- a page introducing your team
Pages will generally either be category pages, which cover whole topics (such as ‘About’) or they will be detail pages, which fall under category pages and provide the substance (such as ‘Welcome’ and ‘Our history’). Category pages will most often make up main menu items and detail pages will be sub-menu or secondary items.
You need to decide which type your pages are and where you think the pages belong. They could be, for example:- A main menu item
- A sub- or secondary menu item
- A footer menu item
Useful tip: A practical way of doing this is to write down the name of each page on a post-it note and stick the notes onto a whiteboard, moving them around until you have an arrangement of content that you feel works for you.
- Design the main navigation
Your main menu bar (or main navigation) will have all the elements and content that you most wish your visitors to see and use. Decide which categories are most important and assign them names which will appear on your main menu. The names should be clear, short and unambiguous. You should ideally limit yourself to fewer than 10 main menu items to avoid the site becoming overly complicated and busy. - Populate the utility/header menu and footer area
The sub-menus (or secondary navigation) are where the content that is not really connected to your primary content will go. These sections or pages are known as utilities and examples could include your privacy policy, terms of use, address (see the footer Quick Links menu, right sidebar and copyright statement in the image above).
Useful tip: Either sketch the menus and dropdowns using pencil and paper or use the post-it note technique.
- Add navigation elements to your content matrix.
Once you are happy with all your menus and where all your content will go, update your content matrix to reflect this.
Wireframe your site
- What is wireframing?
A wireframe is a drawing, which maps out how objects will be arranged on your website pages. It is a simple sketched diagram, with very little emphasis on detail. Wireframes should be:- helpful
- easily understood by anyone
- accompanied by notes
The following diagram is a wireframe of the website page shown in the previous section. This main structure will be set up in the templates which you will be provided with.

- Wireframing guidelines
The easiest way to create a wireframe is to draw it on paper by hand with a pencil and eraser (the eraser in case you change your mind and want to move things around). You could also draw it on a tablet, if you have one, or use diagraming software like Visio, if you are familiar with it.Page elements are generally represented by their shape as it will appear on the page. The following conventions are commonly used when wireframing:

Text
Blocks of text are represented by wavy lines with the main heading spelled out.
Links can be similarly represented, with highlighted links underlined.
If you are using a programme like Visio, you can copy and paste in dummy text such as Lorem Ipsum which you can find online.
Pictures and videos
Pictures are shown as bocks with diagonal lines crossing the centre.
Videos are represented with a triangle ‘play’ button in the centre.
Buttons and custom shapes
You can decide for yourself what you would like the buttons and custom elements of your site to look like. Draw the approximate shape and play around with shapes and layouts to see what works best.The important thing to remember about wireframing is that it is all about trying things out. Nothing is set in stone until you are happy with what you have. It is important to experiment with different layouts and placements of elements until you find what visually works for you and your team.
You will need to wireframe all the page types on your site. Page types will differ (e.g. plain content, contact page, services page), but many of your actual pages may have exactly the same layout and they only need to be wire-framed once. -
When laying out the elements on your page, make sure the most important content is ‘above the fold’. Above the fold is the section of the web page that is visible in a browser window when the page first loads and is what your visitors will see immediately. The portion of the page that requires one to scroll to see the content is called ‘below the fold’.
When placing your elements, make sure that there is a good balance between the amount of text, images and white space on the page (approximately one third each). It is important not to cram too much into your layout as your visitors will put off by overly busy pages.
There are many good tutorials on wireframing and web design and layout on LinkedIn Learning.
Once you have done this, you can move on to writing your content.
Create copy decks
- What are copy decks
Copy decks are the content of your site, set out in Word (or text) documents where you create one document for each page on the site. They allow you to write and review the content of your site separate from any design elements which might interfere with your writing process.
For advice on writing content, you can refer to the Writing for web article, or to the LinkedIn Learning video on user experience and content strategy. - Creating your copy decks
Each page should contain all the relevant copy elements:
- Page title (this is added by a field in the content management system (CMS) and not manually)
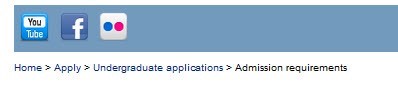
- Breadcrumb (a navigation aid in the form of the path to the page. Visible on this page below the social media buttons). This is added by the CMS and appears automatically.
-
Heading
- Body copy
-
Subheading 1
- Sub copy
-
Subheading 2
- Sub copy
-
Subheading 3
- Sub copy, and so on.
- List your copy decks in the content matrix.
Each document should be listed in your content matrix by file name, along with its status, owner and degree of completion. This will help you keep track of what you have done and what you still need to work on. Double-check your copy decks against your wireframes once you are complete to make sure there is corresponding copy for all of your elements.Once you have completed your layout and copy, you are ready to log a call to have your website created. Run through this final checklist before doing so.