Find out what equipment is in UCT classrooms, and how to use it.
UCT classrooms are flexible
Many of UCT’s centrally-bookable classrooms adhere to an agreed standard in terms of physical environment, audio-visual and information technology (AV/IT). This provides a flexible teaching environment which caters for a range of teaching aids. From laptops to tablets, transparencies, DVDs and even the traditional chalkboard, the classroom environment is flexible enough to accommodate your needs.
What is available in the classroom?
Equipment varies from classroom to classroom, but most centrally-bookable classrooms include the following items:
WARNING: Please submit your request at least 48 hours before the lecture or event.
Where can I find instructions on how to use the equipment?
General instructions are provided below. However, there may be some variations between classrooms. For the most accurate instructions for each classroom, consult the classroom information database for the venue you’ll be teaching in.
Classroom information database
Search the classroom information database for the venue you’ll be teaching in and then click the heading How to use the equipment in this classroom for full instructions. Additional drop-down lists show you what equipment is in the room.
Videos
Using the UCT Classroom* (10 min)
* Note that this video includes an older version of the built-in document camera. This document camera has since been replaced by the AVer document camera (which is covered later on this page).
Using the lectern (2 min)
AVer document camera – with software (3 min)
AVer document camera – without software (2 min)
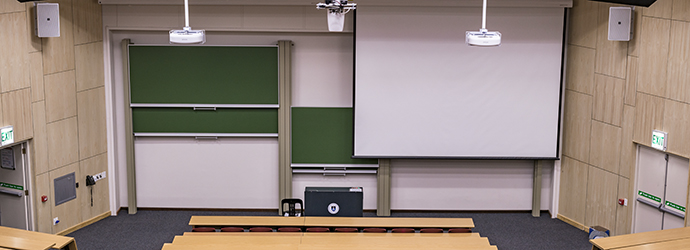
Lighting
Use the light switches and blind controls (if applicable) to adjust the lighting as needed. The switches are usually located on the teaching wall.
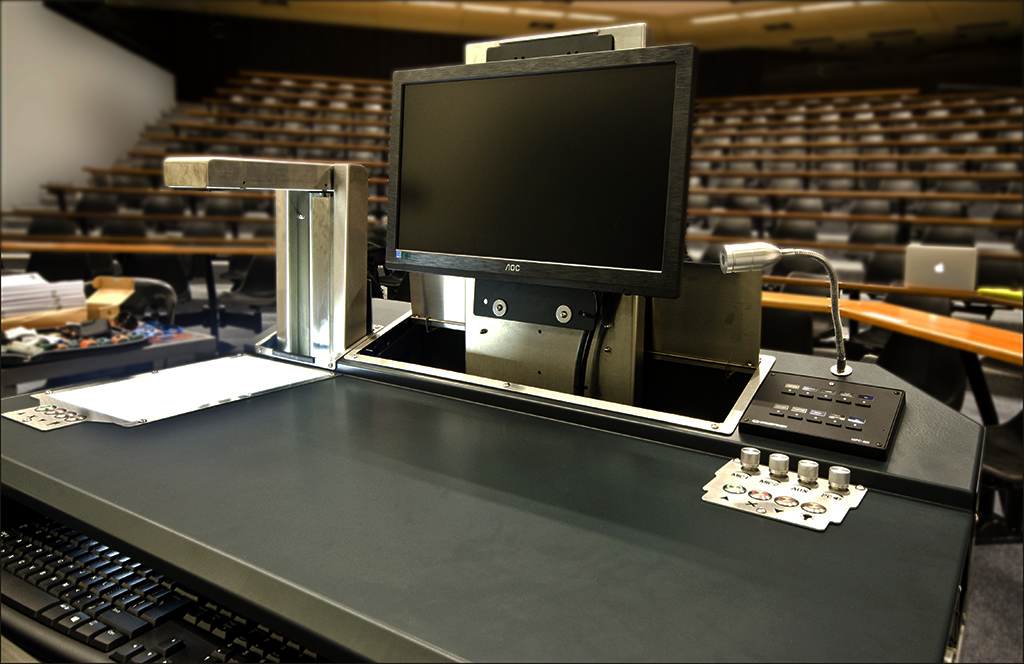
Lectern
The mechanical lectern houses a number of teaching aids and is height-adjustable in some venues. It also includes pull-out trays (for papers or other light objects), power plugs (for charging your laptop / electronic device) and a PC with an optical drive (for playing CDs or DVDs).
Adjust the lectern height: Hold down the Up or Down button on the left hand side of the lectern above the left hand pull-out tray. (This is only applicable for lecture theatres with height-adjustable lecterns.)
Open / close the classroom PC: Use the classroom PC control panel on the right hand side of the lectern. Press the Up button to open the screen. Press the Down button to close these items. In case of emergency, press the X button to stop the movement. In some classrooms, these buttons may also open and close the keyboard and mouse tray. If the keyboard and mouse do not open or close automatically, manually pull out or close the tray to the left of the CD/DVD drive.
Video demo: The UCT lectern
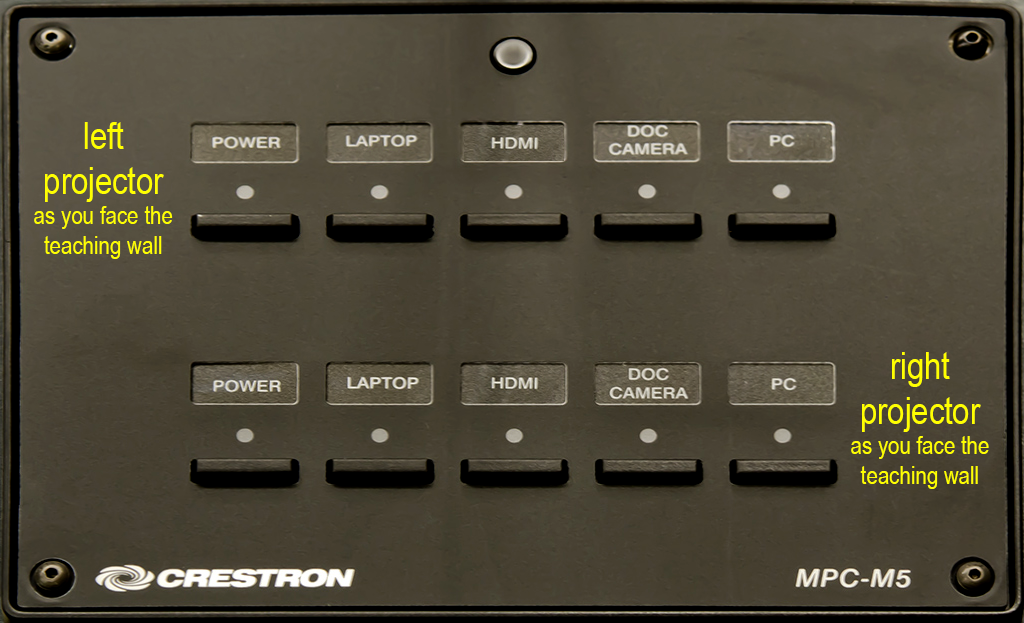
Using the Crestron control panel
Turn on the data projector(s):
Left projector: Press the POWER button in the top row.
Right projector: Press the POWER button in the bottom row.
Select inputs for the left and right projectors: Depending on the selection here, the projectors can either project the same image onto both screens or different images onto each screen.
Classroom PC: Left projector, press the PC button in the top row. Right projector, press the PC button in the bottom row.
Laptop: Use the cables in the safe to connect your laptop to the lectern's input panel (on the right hand side of the lectern). Then, for the left projector, press the LAPTOP button in the top row. For the right projector, press the LAPTOP button in the bottom row.
Document camera: First open the document camera. Then, for the left projector, press the DOC CAMERA button in the top row. For the right projector, press the DOC CAMERA button in the bottom row.
HDMI: Use the cables in the safe to connect your HDMI device (including newer laptop) to the lectern's input panel (on the right hand side of the lectern). Then, for the left projector, press the HDMI button in the top row. For the right projector, press the HDMI button in the bottom row.
Document camera
The document camera acts as a projection surface and can project documents, images and objects. If there’s no built-in document camera in your classroom, you can request a portable unit from the Classroom Support Services team.
The document camera acts as a writing surface – similar to writing on an overhead projector slide – and can project existing documents, images, and objects. Basic instructions for these features are provided below. Advanced functionality includes freezing an image, hiding or emphasising parts of your images, recording video and saving these captures to external storage. Consult the information in each classroom's instruction set to learn how to use the advanced functionality.
Set the switch on the right-hand side of the document camera to RGB.
Turn the document camera on by pressing the power button on the document camera control panel. The power light turns solid blue.
Place your display item (document or object) on the document camera display surface.
Adjust the document camera as required:
Move the camera head as needed.
To brighten your display item, press the LAMP button on the document camera control panel. Adjust the brightness using the increase and decrease brightness buttons.
To adjust image quality or size, either press the AUTO FOCUS button once, or use the dial on the document camera control panel to zoom.
When you've finished using the document camera, switch the light off then press the power button to turn the document camera off. Leave the camera head as is.
NOTE: The above instructions apply to classrooms with the AVer F50 document cameras. However, some classrooms use an alternate model, such as the AVer F17. The directions for using those are included in the instruction sets for those specific classrooms.
Microphone
Take the lapel mic with its body pack out of the safe.
Clip the lapel mic onto your clothing at chest level.
Put the body pack into your pocket or clip onto your belt.
Switch the mic on using the On/Off switch on the body pack.
NOTE: If the light on the body pack is red or amber, the battery is low or in an error state. In this case, request classroom support.
Audio levels
Classroom PC / laptop / other connected device: Use the PC dial on the lectern.
When you're standing in front of a full classroom and you're under pressure to get the equipment working, it can be frustrating trying to figure out what to do - especially if something seems to be broken.
To get immediate help in the classroom:
Type of venue
Who to contact
Centrally-bookable venues on upper, middle and lower campuses
Support hours: 07:30 - 18:00
Phone: (021) 650-4500 and select Option 2 then option 1 (If the teaching wall includes a phone, use it to select the relevant option.)